
The software automatically suggests all relevant landmarks. These can be selected with a left mouse click – click and hold the left mouse button to move the points. The retromolarpad is outlined with a closed line. The centre point (orange) marks the “highest” point of the outlined area and changes its position accordingly when the boundary line is changed.

The green points mark the labial, lingual, and buccal frena. The midline of the jaw is also marked by a point (orange) in the anterior region. The position of the labial and lingual frena can be used as guidance for placing the midline point.
The other points on the alveolar process (blue) mark anatomically relevant points:
- Position of the first lower premolars on the alveolar process – inline with the bucaal frenum.
- The deepest point of the alveolar process – masticatory centre (automatically suggested by the software)
- Stop line – if the angle between the occlusal plane and the course of the alveolar ridge exceeds a value of 22.5 degrees, there should be no tooth contact starting from this point on in order to avoid tipping forces on the “inclined plane” towards the masticatory centre. This prevents the prosthesis from sliding forward. In the selection of the “teeth setup” (later work step), a set-up with or without second molar can be selected depending on the space available between the position of the first molar and the stop line. The anatomical limitation for the placement of a second molar is the anterior point of the retromolarpad. No tooth may be positioned beyond this position, even if the stop line would not be exceeded.
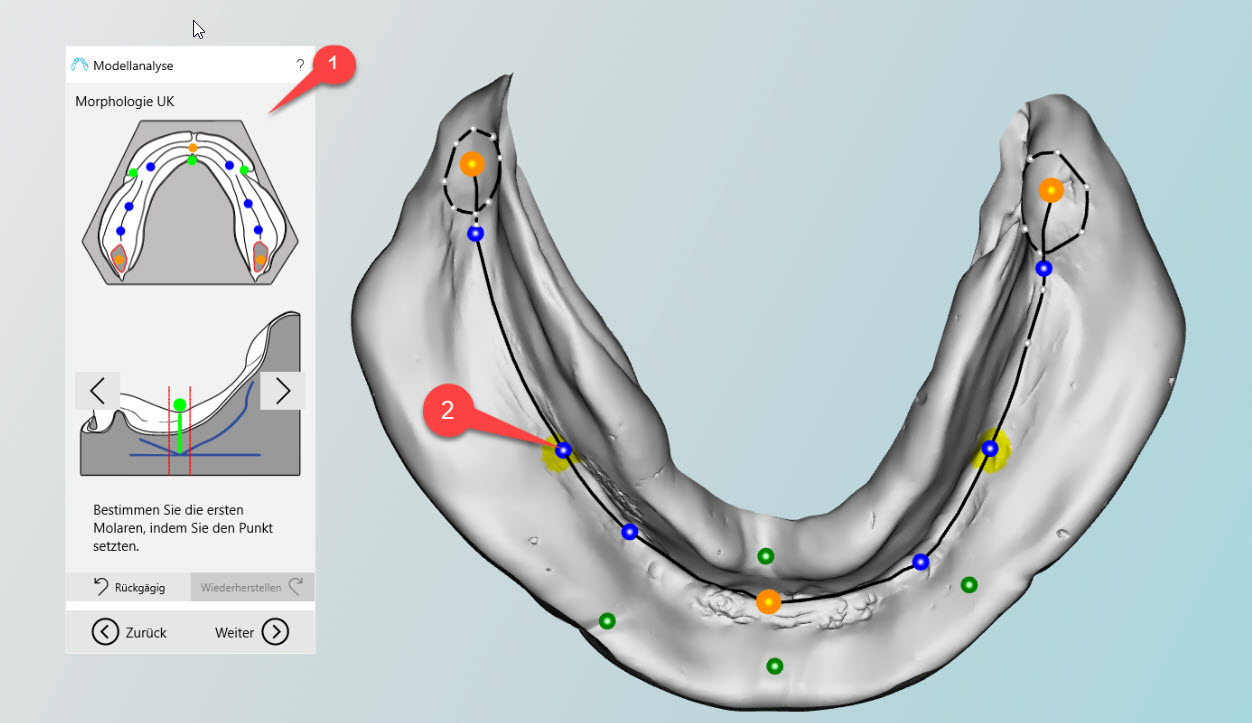
The wizard (left field in the main screen) guides you through the task step by step (1). If an item is selected (2), the corresponding explanation of the step appears in the wizard’s window (1). The sequence of adjusting the points can be done in any order.